MQ4 Gas Sensor with Arduino and Buzzer
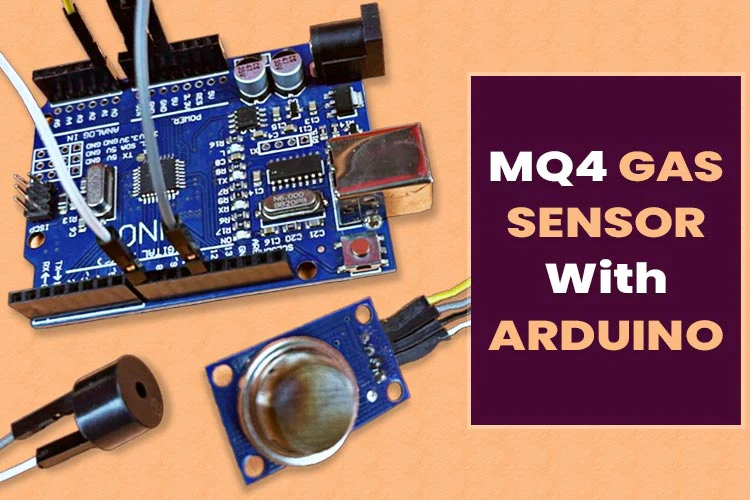
The MQ4 Gas sensor is a type of Metal Oxide Semiconductor (MOS) Gas Sensor primarily designed to detect Methane (CNG) gas levels in the air. It is most commonly used in homes and industries for secure purposes. The sensor comprises a sensing element— a Tin dioxide-coated aluminium-oxide ceramic—encased in a stainless-steel mesh. When gas interacts with this element, its electrical resistance changes, allowing the measurement of gas concentration. With a detection range of 300 to 10,000 PPM, it’s ideal for spotting gas leaks. It’s important to note that combustion of Methane releases a subsequent amount of heat when ignited, which can be beneficial if controlled, but potentially disastrous in accidents.
MQ4 Sensor Specifications
- Operating Supply voltage: 5 volts
- Target Gas: Methane (CNG)
- Concentration Detection Range: 200 to 10000 ppm (parts per million) for methane (CH4)
- Heater consumption: less than 750mw
- Load resistance: 20KΩ
- Operating Temperature: Within a range of -10°C to 50°C
- Operating Humidity: Ranging from 20% to 95% relative humidity
- Preheat Time: Usually around 24-48 hours
Here’s the pinout information for the MQ-4 sensor:
- VCC: The pin is used to provide a power supply to the sensor which is usually around 5V.
- GND: The pin connects the sensor to the ground (0V) of the power supply.
- AOUT: This pin provides the analog output voltage of around 0-5V from the sensor which varies based on the concentration of the detected gas. You can connect this pin to an analog input pin of a microcontroller or an ADC for reading the sensor’s output.
- DOUT: The pin provides a simple digital signal i.e., HIGH (5v) or LOW (0.1v) depending on reaching a certain gas concentration threshold value. The pin is used to trigger alarms or other actions based on gas detection.
MQ-4 Gas Sensor
Power LED: It indicates the ON/OFF state of the sensor.
Output LED: It indicates the state of the sensor when gas is detected.
Comparator IC: This is the controller IC that compares the sensing voltage according to the adjusted sensitivity to identify whether the gas is detected or not, the output result of the IC will be HIGH or LOW at the D0 pin.
Sensitivity Pot: The Pot is used to adjust the sensitivity of gas to be sensed by the sensor to make the transition in digital pin.
Sensing Element: It is a metal mesh that senses the concentration of gases. It requires pre-heat to provide a more accurate value.
Circuit Diagram for Interfacing MQ-4 sensor with Arduino

We will interface the MQ-4 sensor with Arduino to read the Analog as well as the Digital pin output of the sensor. Also, we will involve a buzzer to trigger an alarm when the sensor detects the gas.
We will see the code & calibration of the sensor by its Pot present at the back of the sensor.
Components Required:
- MQ-4 Methane Gas Sensor Module
- Small Piezoelectric Buzzer – 5V Active Buzzer
- Arduino Uno R3
- Jumper wires
MQ-4 Sensor Module Connection:
- Connect the VCC pin to 5V on the Arduino.
- Connect the GND pin to the GND on the Arduino.
- Connect the A0 pin to an Analog pin (e.g., A0) on the Arduino.
- Connect the D0 pin to a Digital pin (e.g., 12) on the Arduino.
Buzzer Connection:
- Connect the +ve terminal of the buzzer to a Digital Pin (e.g., 8) of the Arduino. Skip to connect with Pin 13. It will make a buzzer beep when Arduino starts.
- Connect the other terminal of the buzzer to the Ground of Arduino.

Arduino Code for interfacing MQ4 Sensor with Arduino
The code is reading Analog and Digital input values from the sensor. Also, we incorporated a buzzer, which will beep as the threshold value changes when gas is detected. Both Analog and digital values will be displayed on the serial Monitor.
Here, important to note that we aren’t setting up received analog values as a reference to trigger the buzzer, instead we calibrated our sensor throughout its Pot where the triggering depends on the Digital Pin output.
You can see both the output displayed on the serial monitor in the below image.

Demonstration of MQ-4 Gas Sensor with Arduino

Now that you’ve finished connecting and uploading the code, you can see the values on the Serial Monitor. It’s time to adjust the sensor module’s calibration. You’ll do this by slightly turning the POT until you determine the level of intensity at which the digital pin state should change.
I used a gas lighter, and when I brought it close to sensing metal without lighting the lighter, the sensor indicator light would turn on and the buzzer would start beeping. This happened because gas was leaking from the lighter instead of burning. At the same time, the analog sensor values on the serial monitor would also increase a lot which indicates the intensity of gas.


