IOT based Soil Moisture Monitoring on Arduino Cloud using Arduino Nano ESP32
IOT based Soil Moisture Monitoring on Arduino Cloud using Arduino Nano ESP32
Here we are going to build a smart Irrigation project using Arduino NANO ESP 32, DHT22 (temperature and humidity sensor), soil moisture sensor and Arduino cloud (cloud server and dashboard).
Here we are going to build a smart Irrigation project using Arduino NANO ESP 32, DHT22 (temperature and humidity sensor), soil moisture sensor and Arduino cloud (cloud server and dashboard). Realtime data generated by sensors can be monitored from anywhere on Mobile app as well as web dashboard. We can also operate switch from anywhere using mobile app or dashboard
So now let’s start
So first we know about
What is Arduino NANO ESP 32 Cloud?
Arduino cloud is cloud-based service provided by Arduino (an open-source electronic platform).it allows us to connect our Arduino devices to internet and manage them remotely
Some of the key features of Arduino cloud are
- Remote Monitoring and control
- IOT Integration
- Data Storage and Analysis
- User-friendly interface
- Security
- Automation & Alerts
Table of content
-
- Hardware requirement
-
- Software requirement
-
- Creating thing and dashboard on Arduino cloud
-
- Code and libraries
-
- Circuit diagram
-
- Hardware interfacing
-
- Final working of project
- Conclusion
Hardware requirement of this project
- Arduino NANO ESP32
- DHT22 (Temperature and Humidity) Sensor
- Soil Moisture Sensor
- LED
- Universal PCB
- Breadboard
- Jumper Wire
- USB data cable
Software requirement of this project
- Arduino IDE
- Arduino cloud Web
- Arduino IOT Remote App
- Arduino create agent for cloud
So, let’s start creating Dashboard
- Create/login to Arduino cloud account
- Click on Things > CREAT THING

-
- Click on Add variables
Name > Humidity >Declaration> CloudRelativeHumidityhumidity Type> Relative humidity > Variable Permission> Read Only >Update Policy> On change


Create all variable as mentioned below follow same steps shown above
Name >LED> Declaration> CloudLightlED> Type> Switch> Variable Permission> Read & Write> Update Policy> On change
Name > Moisture > Declaration> floatmoisture > Type> Floating point number > Variable Permission> Read Only > Update Policy> On change
Name > Temperature > Declaration> CloudTemperatureSensortemperature Type> Temperature sensor (°c) > Variable Permission> Read Only > Update Policy> On change

4. Once all variables are created Select and configure associate device
Here we have Selected Arduino Nano ESP 32 Once device is selected properly
The device ID and Device Secret key will Displayed we have to Copy it and save It

After selecting the device, we have to configure the network. (Providing name and credential information of Wi-Fi or Hotspot & Device secrete key) to which we are supposed to connect our Arduino
Nano ESP32
Follow the steps as shown below
5.Configure network >Wi-Fi Name>Wi-Fi Password>Device Secrete key


6. Create a dashboard
After configuring the network, we create a dashboard where our data will be displayed and Monitored
Follow the steps
Click on Dashboards > CREATE DASHBOARD > ADD


Select variable; Switch > Link variable


Things >LED>LINK VARIABLE>DONE


In this step we create a dashboard icon and connect those icons to variables which we had created earlier
Follow above steps for linking all the variables mentioned below
Similarly; ADD>GAUGE> Link variable > Things >Temperature>LINK VARIABLE>DONE
Similarly; ADD>Percentage> Link variable > Things >Humidity>LINK VARIABLE>DONE
Similarly; ADD> Percentage > Link variable > Things >Moisture>LINK VARIABLE>DONE
Similarly; ADD> Chart > Link variable > Things >Temperature>LINK VARIABLE>DONE
7.Now Open Sketch in full Editor


8.Edit the code according to variables

9.Download Arduino Create Agent & Connect Arduino Nano ESP32 board in bootloader mode

10. Select the proper Arduino Board and port

11. Verify and upload the code

(NOTE: – Be sure Arduino NANO ESP32 is in bootloader mode, Arduino Create Agent is active &other Arduino IDE are closed while uploading code otherwise board will throw ERROR)
CODE:
#include "arduino_secrets.h"

/*

  Sketch generated by the Arduino IoT Cloud Thing "Untitled"

  https://create.arduino.cc/cloud/things/187bfad8-5590-4e74-8cfc-15e06c1344b5


  Arduino IoT Cloud Variables description


  The following variables are automatically generated and updated when changes are made to the Thing


  float moisture;

  CloudLight lED;

  CloudTemperatureSensor temperature;

  CloudRelativeHumidity humidity;


  Variables which are marked as READ/WRITE in the Cloud Thing will also have functions

  which are called when their values are changed from the Dashboard.

  These functions are generated with the Thing and added at the end of this sketch.

*/


#include "thingProperties.h"

#include <DHT.h>;


//Constants

#define LED_PIN 2

#define DHTPIN 13  // what pin we're connected to

#define DHTTYPE DHT22   // DHT 22  (AM2302)

DHT dht(DHTPIN, DHTTYPE);//// Initialize DHT sensor for normal 16mhz Arduino

int SENSOR_PIN = A0; // Analog pin defined for soil moisture sensor

float percentage;


float map_low = 4100;

float map_high = 2700;

void setup() {

  // Initialize serial and wait for port to open:

  Serial.begin(9600);

   pinMode(LED_PIN, OUTPUT);

   pinMode(DHTPIN,INPUT);

   pinMode(SENSOR_PIN,INPUT);

  // This delay gives the chance to wait for a Serial Monitor without blocking if none is found

  delay(1500);

  dht.begin();


  // Defined in thingProperties.h

  initProperties();


  // Connect to Arduino IoT Cloud

  ArduinoCloud.begin(ArduinoIoTPreferredConnection);


  /*

     The following function allows you to obtain more information

     related to the state of network and IoT Cloud connection and errors

     the higher number the more granular information you’ll get.

     The default is 0 (only errors).

     Maximum is 4

 */

  setDebugMessageLevel(2);

  ArduinoCloud.printDebugInfo();

}


void loop() {

  ArduinoCloud.update();

  // Your code here

   float m = analogRead(SENSOR_PIN);

    moisture = m;


  Serial.print("Raw: ");

  Serial.print(moisture);


  percentage = map(moisture, map_low, map_high, 0, 100);

  moisture = percentage;

   if (percentage > 50) {

    digitalWrite(LED_PIN, LOW);

    Serial.print("Water Pump is OFF ");

  } else {

    digitalWrite(LED_PIN, HIGH);

    Serial.print("Water Pump is ON");

  }

  Serial.print(" | Percentage: ");

  Serial.print(percentage);

  Serial.println("%");


  delay(1000);

  float h = dht.readHumidity();

  float t = dht.readTemperature();

  temperature = t;

  humidity = h;

  if (isnan(humidity) || isnan(temperature)) {

    Serial.println("Failed to read from DHT sensor!");

  }else{

  Serial.print(F("Temprature- "));Serial.print(t);

  Serial.print(F("Humidity- "));Serial.print(h);

  delay(2000);

  }


}

/*

  Since LED is READ_WRITE variable, onLEDChange() is

  executed every time a new value is received from IoT Cloud.

*/

void onLEDChange()  {

  if (lED == 0 )

  {

    digitalWrite(LED_PIN, LOW);

  }

  else

  {

    digitalWrite(LED_PIN, HIGH);

  }

  // Add your code here to act upon LED change

}
Libraries:
If your using Arduino cloud for uploading code Arduino cloud agent will download all necessary libraries automatically
If not
Download
Arduino_ESP_32_OTA from Library manager of Arduino IDE

If you want to upload code from Arduino IDE Download it from Arduino cloud sketch
Add network credential properly with device secret key.
(NOTE: Don’t forget to pause Arduino create agent else IDE can throw ERROR)
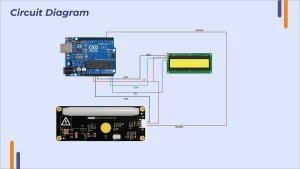
Circuit diagram:
Hardware interfacing
We have made the connection on PCB as shown in circuit diagram

Assembled all the components on PCB and provided supply to Arduino Nano ESP32 board
As code is already uploaded, we just need to verify all connections are proper and our Wi-Fi is operational and Arduino Nano ESP32 board is connected to Wi-Fi & Cloud dashboard


Demonstration /how it works
Sensor is in moist soil moisture is optimum in soil, so LED is OFF
Other Climatic factors like temperature and humidity are measured are displayed as shown on mobile screen

Sensor is out of moist soil no moisture is sensed by sensor so LED is ON, and it will remain ON until moisture reaches optimum level

Conclusion:
In this way we have created a project for Monitoring Temperature, Humidity and soil moisture Using Arduino Nano ESP 32 & Arduino cloud for smart irrigation. By using the power of cloud technology this project offers wide range of benefits, from improving water usage efficiency to real-time monitoring & control capabilities which can empower farmers to make data-driven decision, leading to increase in crop yield.


