
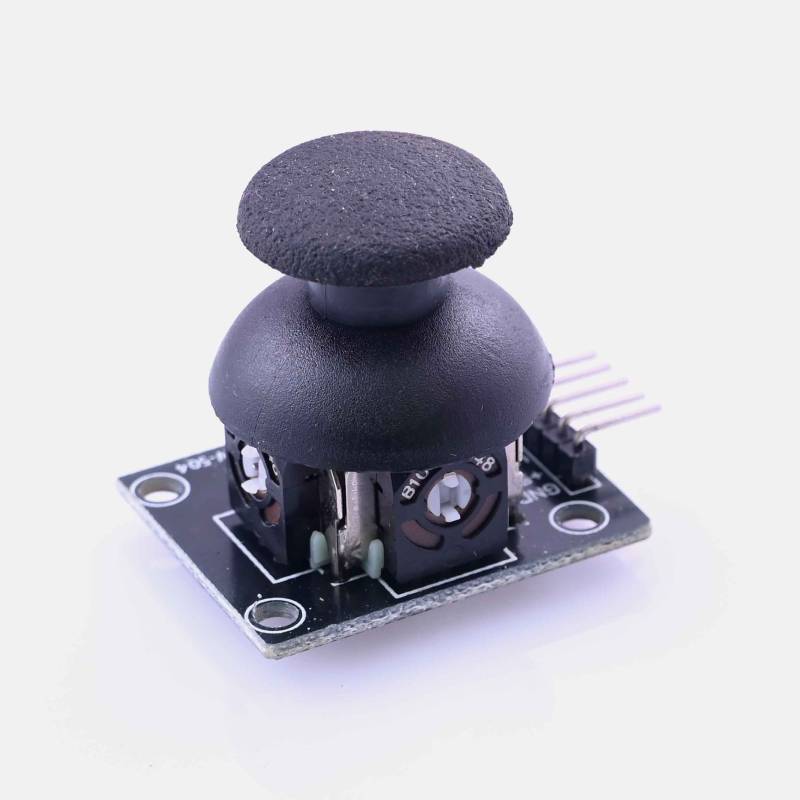

Dual Axis XY Joystick Module
Original price was: ₹45.00.₹35.00Current price is: ₹35.00.
Joystick Module Features and Specifications:
- Compatible with Arduino or with most of the microcontrollers
- Two independent Potentiometers – one for each axis ( X and Y)
- Auto return to center position
- Low weight
- Cup-type Knob
- Operating Voltage: 5V
- Internal Potentiometer value: 10k
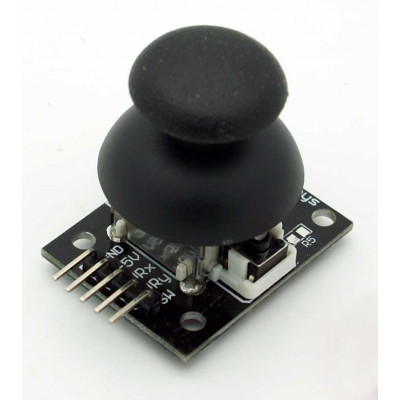
- 2.54mm pin interface leads
- Dimensions: 1.57 in x 1.02 in x 1.26 in (4.0 cm x 2.6 cm x 3.2 cm)
- Operating temperature: 0 to 70 °C
Description
This is a dual axis high quality JoyStick Module . It can be used to sense movements in 2 directions(axes). It also has a inbuilt switch which can be activated by pressing the stick.Directional movements are simply two potentiometers – one for each axis. Pots are ~10k each.
With the help of this Joystick Module, you can measure position coordinates on the X and Y axis by moving the “hat”. It also contains a switch that is press-able by pushing the “hat”.It also contains a switch that is press-able by pushing the “hat” down. Similar to the XBOX controller.
The X and Y axes are two 10k potentiometers which control 2D movement by generating analog signals. When the module is in working mode, it will output two analog values, representing two directions. This module uses the 5V power supply, and value, when reading through analog input, would be about 2.5V, a value will increase with joystick movement and will go up till maximum 5V; the value will decrease when the joystick is moved in other direction till 0V.
Specifications and Features:-
- Dimensions: 40 x 27 x 15 (LxWxH) mm
- Weight: 10gm (without Hat).
- 2.54mm pin interface leads
- Operating Voltage: 5V.
- Long service life and stable performance
- Standard interface and electronic building blocks
- Widely use in Arduino DIY projects
- Cross rocker as a two-way 10K resistor, with the rocker in a different direction
Additional information
| Weight | 200 g |
|---|---|
| Dimensions | 10 × 10 × 10 cm |
sharat chandran –
Great joysticks!
I’ve used several of these so far, and been happy with all of them. I’ve connected them to an Arduino’s 5v, gnd, and analog inputs. The only issue that I’ve seen is that they don’t center exactly on 512–they center somewhere around 490 to 525 ish. But they move smoothly and evenly across the range.
sona –
Joyfull Thumbs
Needed some extra stock items… I did use 1 in a little build project and it turned out nice, the tension in the springs was perfect, the responce of the resistors very smooth and even, no glitchyness.
kushal –
Smooth gradation of values – see code…
I’m not sure why some folks are having issues getting a smooth sample of values across the stroke of the joystick’s axis. It is important to note these are not intended to be maxed out to an extent position anyway. You can only move about half way or a little more to the edge before it is overwhelmed. So perhaps people are just not moving slowly. Got me. But here is some code I used to test mine with. No issues. I hope this helps someone…/* micro joystick test sketch / atomkey 2019 doesn’t test for the push button feature – that’s simple ~does test for the analog read on the x and y axis I coded this for folks that have said there are only three gradations of measure they can get. This runs fine on my Arduino and generates a smooth gradation from 1024 max to 512 center and then to 0 minimum. Keep in mind the joystick isn’t intended to be moved to its extreme extents. The boundry is not at the outer edge. 4 wires from the joystick to the arduino 2 for the axis 1 for the ground and 1 for the +5v */int sensorPinX = A0; // input pin joystick x axisint sensorPinY = A1; // input pin joystick y axisint sensorValueX = 0; // variable x axisint sensorValueY = 0; // variable y axisvoid setup() { Serial.begin(9600);}void loop() { // read the x,y values from the sensor: sensorValueX = analogRead(sensorPinX); sensorValueY = analogRead(sensorPinY); Serial.print(sensorValueX); // show results Serial.print(” “); // on serial monitor as Serial.println(sensorValueY); // two columns of data delay(150); // for even smoother (stable) results you can perform a // mean sample run. That’s where you sample the signal // n times over t seconds and take the average of the reads.}
mihir –
They work great and the kids like to play with them
varun –
Great Item
Great Item and Service
ram kumar –
These are great! I used four for my first robotics project …
These are great! I used four for my first robotics project and they work perfectly.