Voice Recognition Module and Arduino
Voice Recognition Module and Arduino
The way we interact with devices has been revolutionized by voice recognition technology, providing us with a convenient and easy way to control them. Whether it is smartphones, smart speakers, or home automation systems, voice recognition allows us to effortlessly give commands using simple spoken words. Let us explore how voice recognition can be applied in different aspects of our lives and experience its incredible usefulness.
Components Required
- Voice Recognition Module V3.1
- An Arduino UNO R3 Development Board
- 4 LEDs of different colours
- Breadboard
- Buzzer
- Jumper Cables
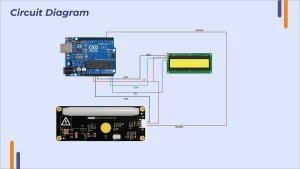
Circuit Diagram

Connecting the Module to Arduino:
- GND of the module to GND Pin of Arduino UNO.
- Tx of the module to Digital Pin 2 of Arduino UNO.
- Rx of the module to Digital Pin 3 of Arduino UNO
- VCC of the module to 5V Pin of Arduino UNO
Breadboard Connections:
- LEDs connected to pins D9-D12 of Arduino UNO
- Buzzer Connected to D8 of Arduino UNO
- All grounds connected to GND of Arduino
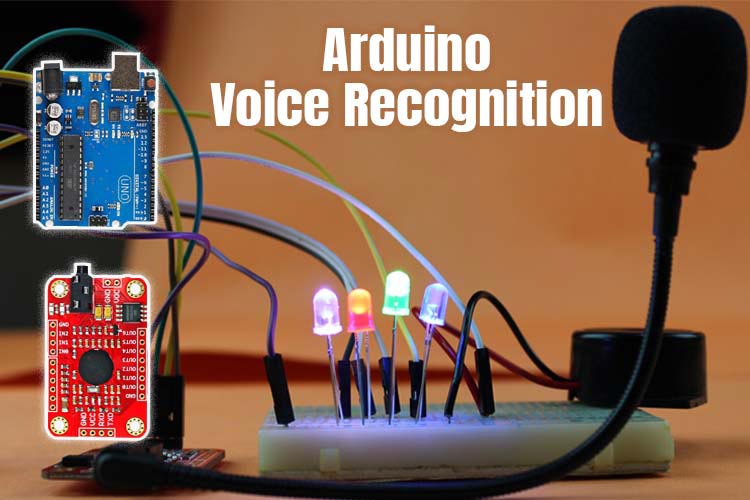
Once you are done making the connections, it should look something like this:

What is Voice Recognition Module?
Before we learn about how the circuit and the code work, we shall look into the working of the receiver module and its specifications. You can learn about the module and the pins in great detail by going through the User Manual provided by Elechouse. I have only discussed the pins I used to build this project.
Parameters:
- Voltage: 4.5-5.5V
- Current: <40mA
- Analog Interface: 3.5mm mono-channel microphone connector + microphone pin interface
- Size: 31mm x 50mm
- Recognition accuracy: 99% (under ideal environment)
Features:
- Support a maximum of 80 voice commands, with each voice 1500ms (one or two words speaking)
- Maximum 7 voice commands effective at the same time
- Arduino library is supplied
- Easy Control: UART/GPIO
This module stores voice commands as a single group, similar to a library. Up to 7 voice commands from the library can be imported into the recognizer, resulting in the simultaneous effectiveness of those 7 commands.
What is a Recogniser?
It is a container that stores up to 7 acting voice commands, which is an essential component of the voice recognition module. This container functions similarly to a game of “playing balls” where you have a team of 80 players, but only 7 players are allowed to play on the court at a time according to the rules. In this analogy, the Recognizer refers to the list of players currently on the court.

Voice Recognition Module Pinout

- VCC: This pin is connected to the Arduino 5V pin.
- GND: This pin is connected to the ground pin of the Arduino.
- RX: This pin is used for serial reception of data from the module to the microcontroller or host device.
- TX: This pin is used for serial transmission of data from the microcontroller or host device to the module.
Winbond W25Q32JV
The W25Q32JV is a Serial Flash memory that has a storage capacity of 32M bits. It is designed for limited space, pins, and power systems. The 25Q series offers more flexibility and better performance compared to regular Serial Flash devices. It is perfect for code shadowing to RAM, executing code directly from Dual/Quad SPI (XIP), and storing voice, text, and data.
The device can operate on a power supply of 2.7V to 3.6V and has a very low current consumption of 1µA when in power-down mode.
The Elechouse Voice Recognition Module V3.1 makes use of the W25Q32JV serial flash memory chip for storage. This chip enables the module to store voice recognition models, voice prompts, and other relevant data. Even when power is disconnected, the flash memory ensures that the stored information is retained. By incorporating the W25Q32JV, the module can increase its capacity for storing a greater number of voice patterns or longer voice prompts, thereby enhancing its functionality for voice recognition applications.
Training the Voice Recognition Module
Downloading the Arduino Library:
- Connect the Arduino to the Module by following the connections mentioned above. Once done, download the Voice Recognition V3 library.
- After downloading, extract the ZIP file using software like WinRAR or 7-ZIP.
- Copy the extracted folder and paste it into the libraries subfolder in the Arduino folder. Now you can use this library in Arduino IDE without any errors.
Now, open Arduino IDE on your computer.
- Open vr_sample_train (File -> Examples -> VoiceRecognitionV3 -> vr_sample_train)
- Choose the right Arduino board (Tool -> Board, UNO), Choose the connected port.
- Click the Upload button, and wait until the code is uploaded to Arduino UNO.
- Open Serial Monitor and set the Baud rate to 115200.

Once you open the serial monitor, you will get this window.
Now, in the text box at the top, enter “train 0” or “sigtrain 0 signature” to train the voice module. The indexing starts from 0, so the numbers begin from there. The signature part is up to you. For example, I am using the 0th command for controlling White LED, so I have used the signature as white. So, the full command will be “sigtrain 0 white”.
I have already trained the first 7 voices, so I will utilize train 8. It is possible to revise the previous commands by utilizing the same train number. However, I have not done it in this case as I will incorporate some of my past commands into the project.

The module may need multiple attempts before recognising your voice, so do not worry if it does not initially recognise your voice. Consider training the module in a quieter setting to ensure it records your voice without any external disruptions.
When the Serial Monitor displays the message “Speak now”, you are required to speak, and when the Serial Monitor displays the message “Speak again”, you need to repeat your voice. If these two voices match, the Serial Monitor will print “Success” and the recording labelled as “record 0” will be trained. If the voices do not match, you need to continue speaking until a successful match is achieved.
Similarly, you can train up to 80 voice commands, but keep in mind only 7 can be used at a time.
Now that we have learned how to train the module, let us see the final code for the project.
Working of the Project
Carefully make all the connections by following the connections shown in the circuit diagram section. Once you are finished with making the connections, verify them and then connect the Arduino IDE to your computer.
I have used 6 different commands here to control the LEDs and 7th command to control the buzzer. You can use whatever command you like; you can train the module and use the record that you wish to.

Arduino Code
| #include <SoftwareSerial.h> #include <VoiceRecognitionV3.h> VR myVR(2,3); // 2:RX 3:TX, you can choose your favourite pins. uint8_t records[7]; // save record uint8_t buf[64]; int led = 12; int led1 = 11; int led2 = 10; int led3 = 9; int buzzer = 8; #define White (0) #define Red (1) #define Green (2) #define Blue (3) #define Off (4) #define Blink (5) #define detonate (6) void printSignature(uint8_t *buf, int len) { int i; for(i=0; i<len; i++){ if(buf[i]>0x19 && buf[i]<0x7F){ Serial.write(buf[i]); } else { Serial.print(“[“); Serial.print(buf[i], HEX); Serial.print(“]”); } } } void printVR(uint8_t *buf) { Serial.println(“VR Index\tGroup\tRecordNum\tSignature”); Serial.print(buf[2], DEC); Serial.print(“\t\t”); if(buf[0] == 0xFF){ Serial.print(“LED”); } else if(buf[0]&0x80){ Serial.print(“UG “); Serial.print(buf[0]&(~0x80), DEC); } else { Serial.print(“SG “); Serial.print(buf[0], DEC); } Serial.print(“\t”); Serial.print(buf[1], DEC); Serial.print(“\t\t”); if(buf[3]>0){ printSignature(buf+4, buf[3]); } else { Serial.print(“NONE”); } Serial.println(“\r\n”); } void setup() { myVR.begin(9600); Serial.begin(115200); Serial.println(“Elechouse Voice Recognition V3 Module\r\nControl LED sample”); pinMode(led, OUTPUT); pinMode(led1, OUTPUT); pinMode(led2, OUTPUT); pinMode(led3, OUTPUT); pinMode(buzzer, OUTPUT); if (myVR.clear() == 0) { Serial.println(“Recognizer cleared.”); } else { Serial.println(“Not find VoiceRecognitionModule.”); Serial.println(“Please check connection and restart Arduino.”); while (1); } if (myVR.load((uint8_t)White) >= 0) { Serial.println(“onRecord loaded”); } if (myVR.load((uint8_t)Red) >= 0) { Serial.println(“onRecord1 loaded”); } if (myVR.load((uint8_t)Green) >= 0) { Serial.println(“onRecord2 loaded”); } if (myVR.load((uint8_t)Blue) >= 0) { Serial.println(“onRecord3 loaded”); } if (myVR.load((uint8_t)Off) >= 0) { Serial.println(“offRecord loaded”); } if (myVR.load((uint8_t)Blink) >= 0) { Serial.println(“blink loaded”); } if (myVR.load((uint8_t)detonate) >= 0) { Serial.println(“buzzer loaded”); } } void loop() { int ret; ret = myVR.recognize(buf, 50); if (ret > 0) { switch (buf[1]) { case White: digitalWrite(led, HIGH); break; case Red: digitalWrite(led1, HIGH); break; case Green: digitalWrite(led2, HIGH); break; case Blue: digitalWrite(led3, HIGH); break; case Off: digitalWrite(led, LOW); digitalWrite(led1, LOW); digitalWrite(led2, LOW); digitalWrite(led3, LOW); break; case detonate: for (int delayTime = 500; delayTime >= 10; delayTime -=10 ) { digitalWrite(buzzer, HIGH); delay(100); digitalWrite(buzzer, LOW); delay(delayTime); } digitalWrite(buzzer, HIGH); digitalWrite(led, HIGH); digitalWrite(led1, HIGH); digitalWrite(led2, HIGH); digitalWrite(led3, HIGH); delay(2000); digitalWrite(buzzer, LOW); digitalWrite(led, LOW); digitalWrite(led1, LOW); digitalWrite(led2, LOW); digitalWrite(led3, LOW); break; case Blink: digitalWrite(led, HIGH); delay (100); digitalWrite(led, LOW); delay (100); int n=5; for(int i=0;i<=n;i++){ digitalWrite(led1, HIGH); delay (100); digitalWrite(led1, LOW); delay (100); digitalWrite(led2, HIGH); delay (100); digitalWrite(led2, LOW); delay (100); digitalWrite(led3, HIGH); delay (100); digitalWrite(led3, LOW); digitalWrite(led2, HIGH); delay (100); digitalWrite(led2, LOW); delay (100); digitalWrite(led1, HIGH); delay (100); digitalWrite(led1, LOW); delay (100); digitalWrite(led, HIGH); delay (100); digitalWrite(led, LOW); } break; default: Serial.println(“Record function undefined”); break; } printVR(buf); } } |
Results on Serial Monitor

Explanation Of Code
- Libraries are included for the Voice Recognition Module V3.1 and SoftwareSerial.
- Variables and pin declarations are made for LEDs and the buzzer.
- Constants are defined for different voice commands, White, Blue, Green etc.
- Functions are defined to print the signature and information of recognized voice commands. I have not defined any signatures, however, you do it by using the sigtrain command instead of train.
- In the setup() function:
– The Voice Recognition Module is initialized.
– Serial communication is initiated.
– Pin modes are set for LEDs and the buzzer.
– Voice commands are loaded into the module.
- In the loop() function:
– Voice commands are recognized using myVR.recognize().
– A switch statement is used to perform actions based on the recognized command.
– For each command, the corresponding LED(s) or buzzer is turned on or off using digitalWrite().
– Information about the recognized command is printed using printVR().
Conclusion
In conclusion, the Voice Recognition Module V3.1 is a powerful tool that allows you to interact with your Arduino projects using voice commands. By incorporating this module, you can easily control devices and initiate actions without using your hands. It can identify certain voice patterns and assign them to specific functions. With its user-friendly nature and adaptability, the Voice Recognition Module presents endless opportunities for creating applications, home automation systems, robotics, and other voice-controlled devices.


